Step 1: Registration
Click on the "Create Dancemanager" button. If you are not yet registered, you will be guided through the registration process:
- Enter your username or email address.
- Fill in the required fields, including username, first name, surname and email address.
- Enter a password for your account.
Step 2: Create a Dancemanager
Once you have successfully registered, you can start creating your Dancemanager:
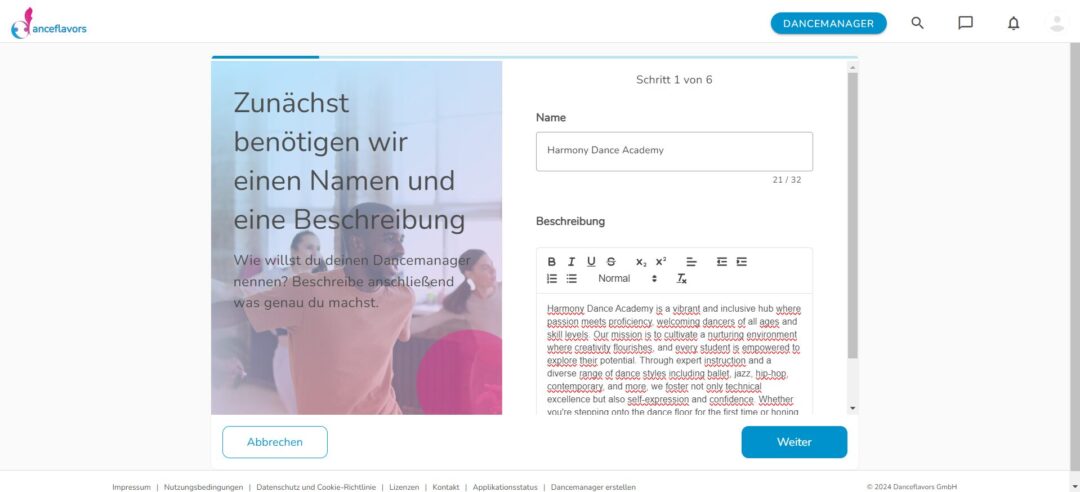
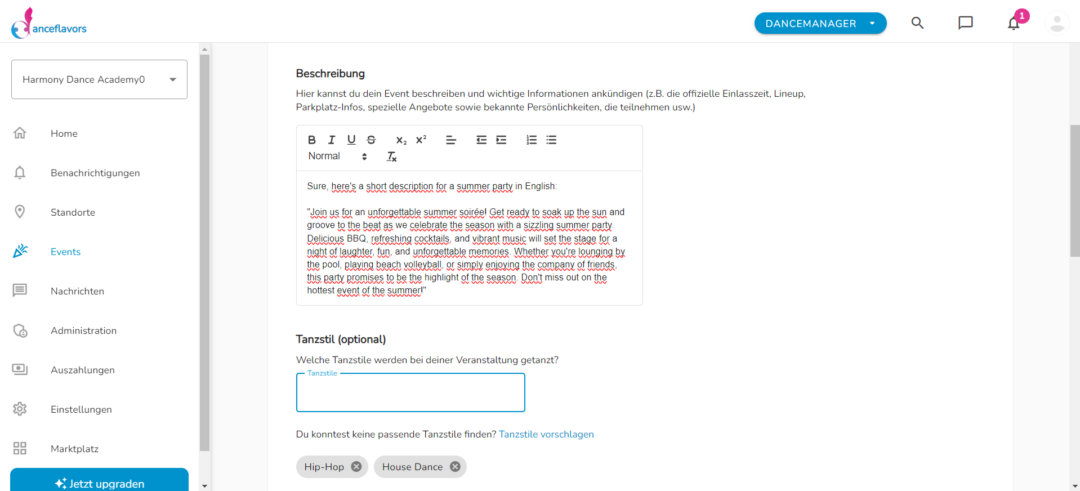
- Choose a name for your Dancemanager and write a description text to explain what you offer.
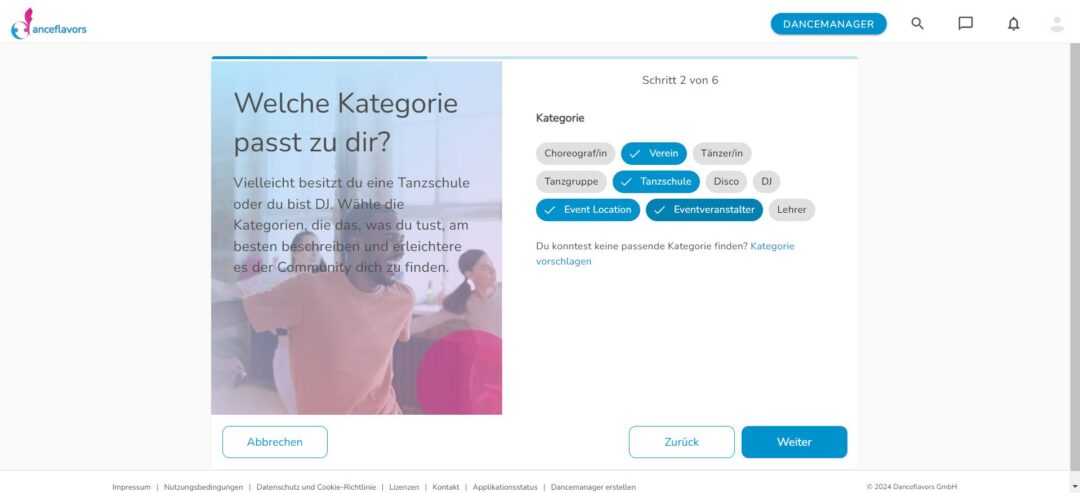
- Choose the category that best suits you or your dance school. If no suitable category is available, you can also suggest a new one.

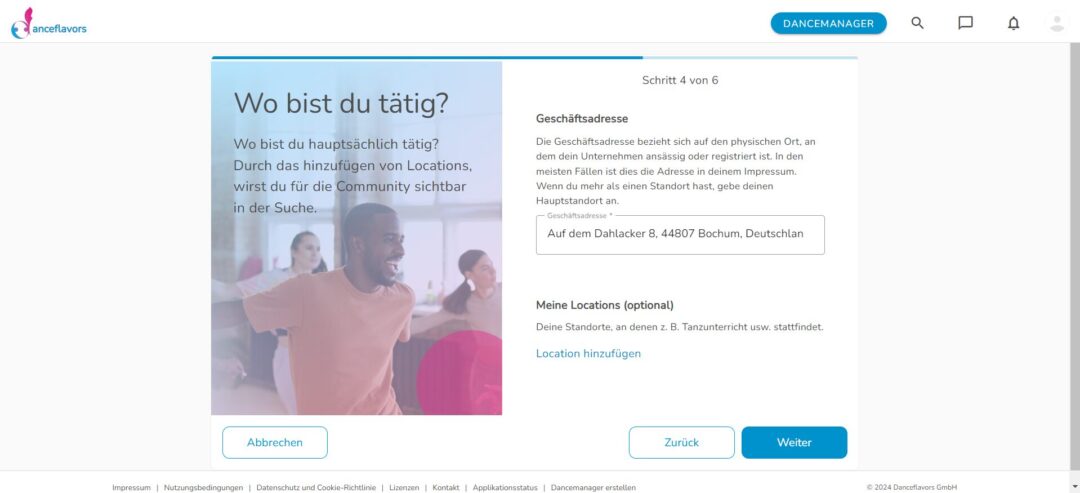
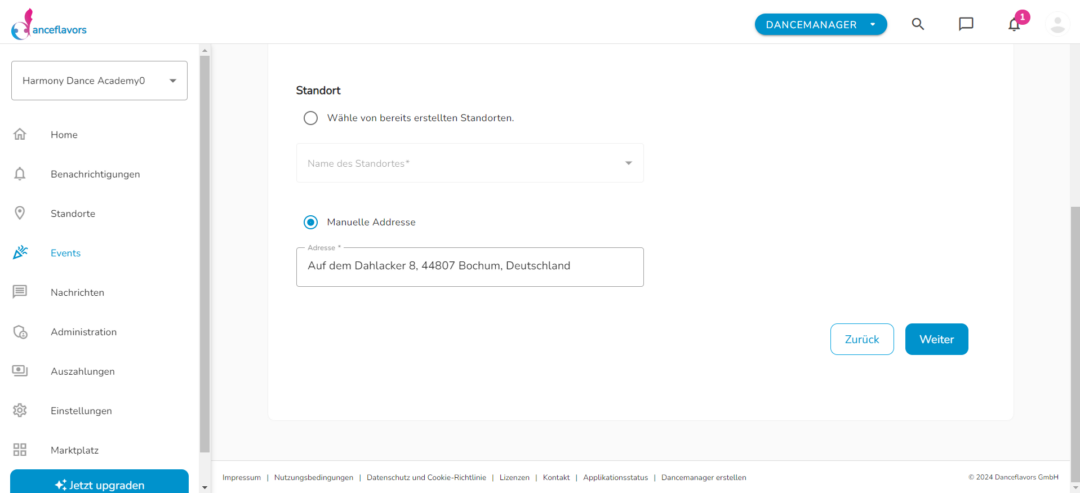
- Enter your business address. If the dance lessons take place at a location that does not belong to you, add this location to "My locations" and add further information such as opening hours.
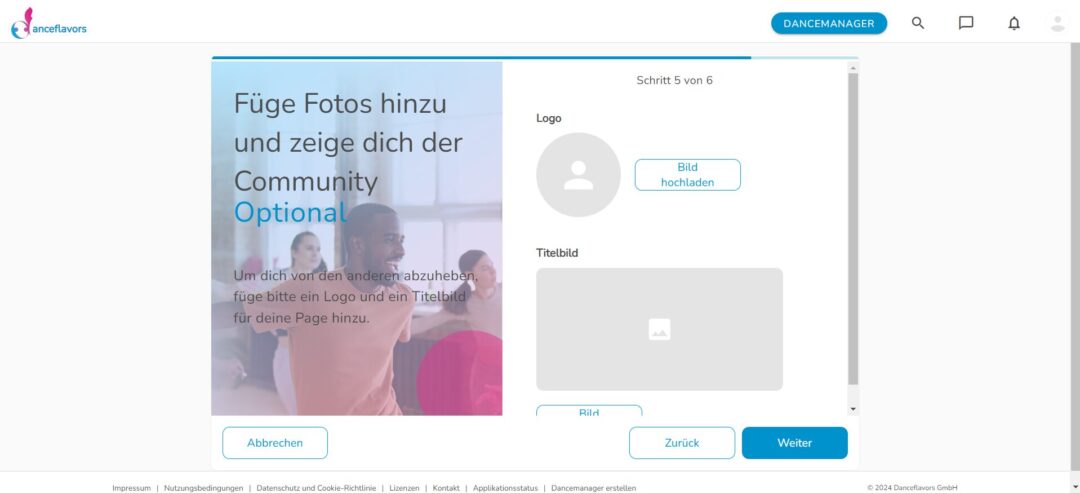
- Add your logo and a cover image for your page.
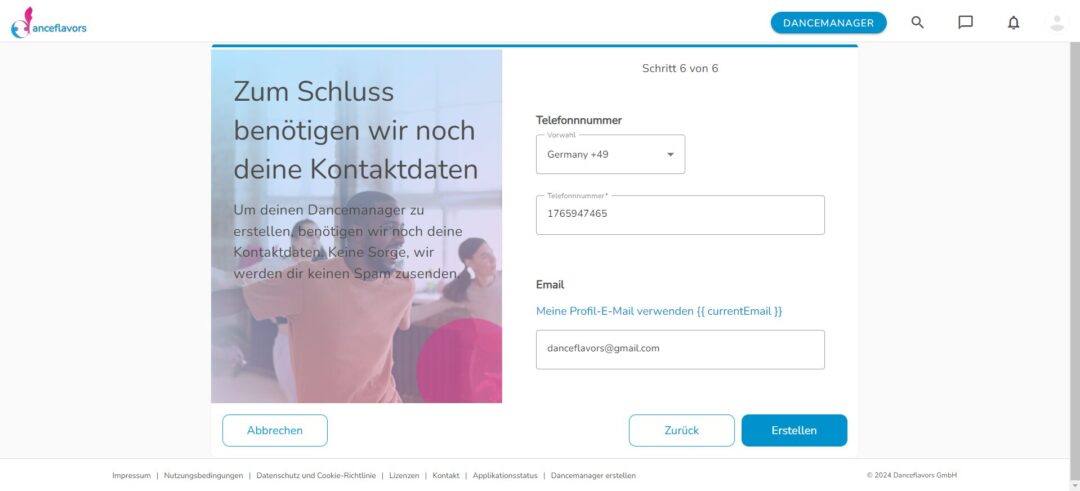
- Enter your business phone number and your business email address.
- Check all the information you have entered and click on "Confirm" or "Create" to successfully create the Dancemanager.
Step 3: Customise and finish
Upload or replace images to customise your page. Congratulations! Your Dancemanager has been successfully created.
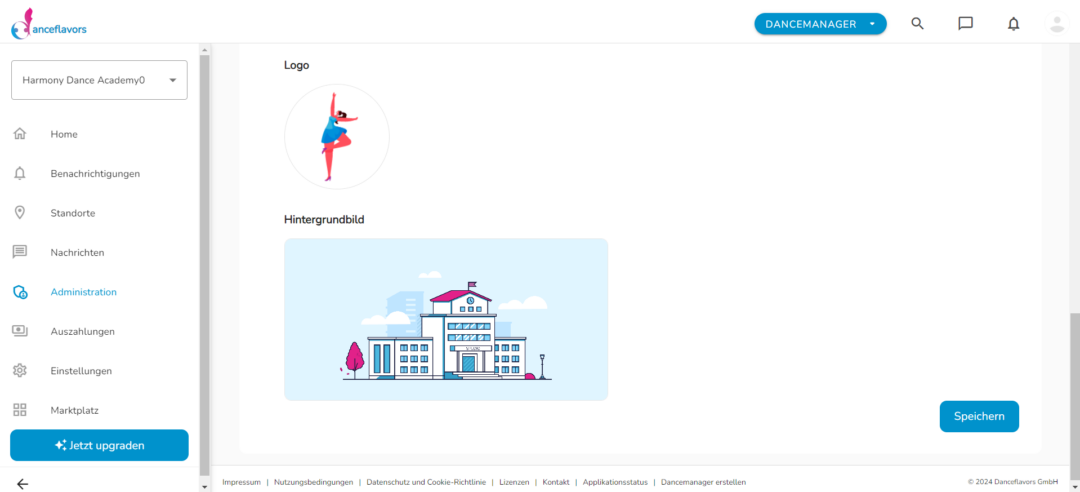
1. general settings:
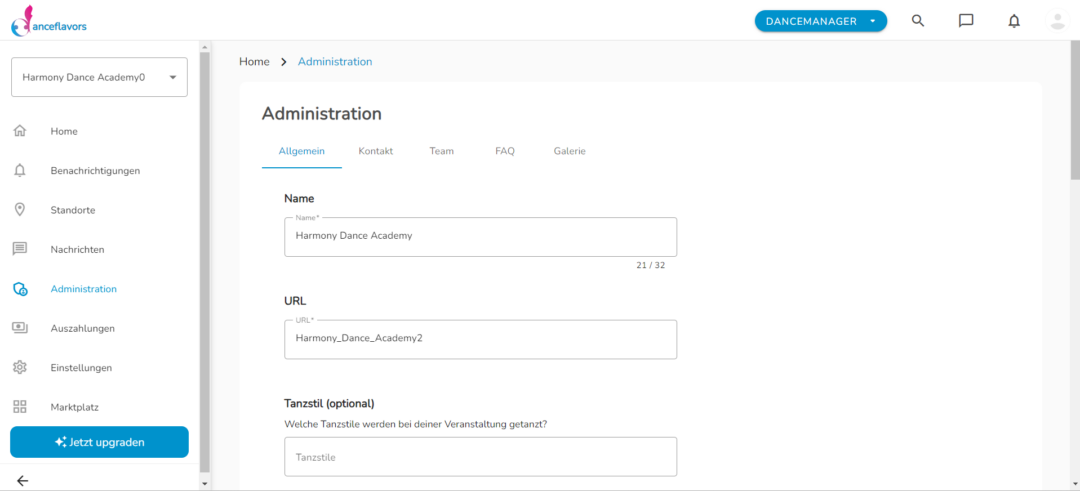
- Go to your Dancemanager profile and navigate to the "Administration" section.
- Check the "General" section

- Check the information already entered, such as the name, the URL of your page and the selected dance styles.
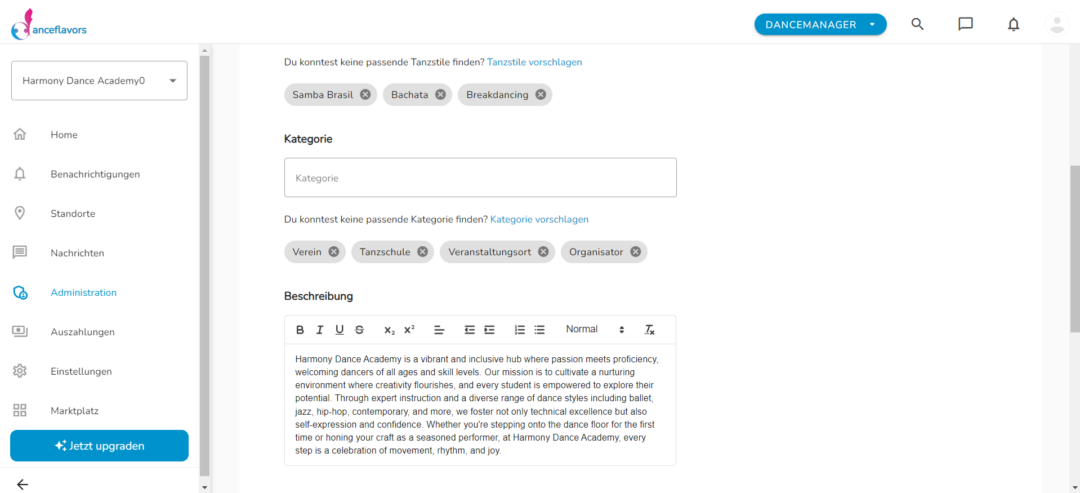
- Customise the categories by removing them or adding new ones.

- Edit your description text to add more information.
- Change your images if necessary and then click on "Save".
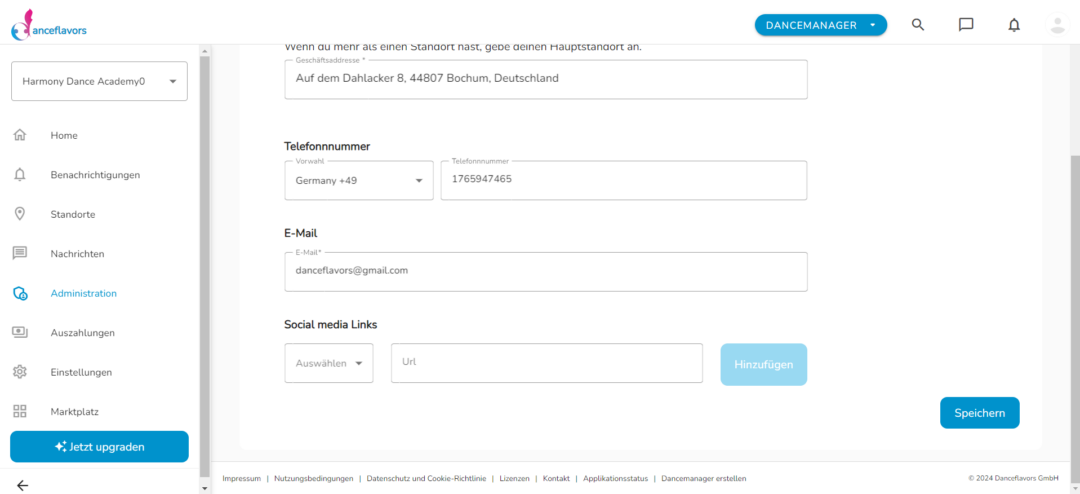
2. Update contact details:
- Go to the "Contact" tab:

- Add the public business address of your dance school.
- Link your phone number, email and social media profil

- Select the desired platform and copy the link of your profile into the corresponding field.
- Click on "Save" at the end to save your changes.

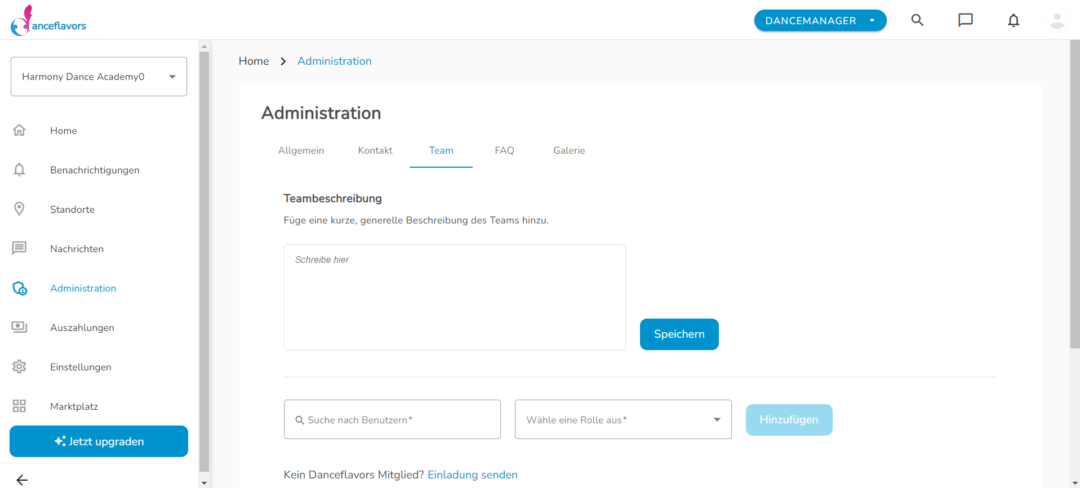
3. Team management:
- Go to the "Team" tab:

- Write a short text about your team.
- Search for people from your team and add them to your profile.
- Assign different roles to the team members.
- Invite new team members using the corresponding button and assign them a role.
- Manage the roles of your team and edit them if necessary.
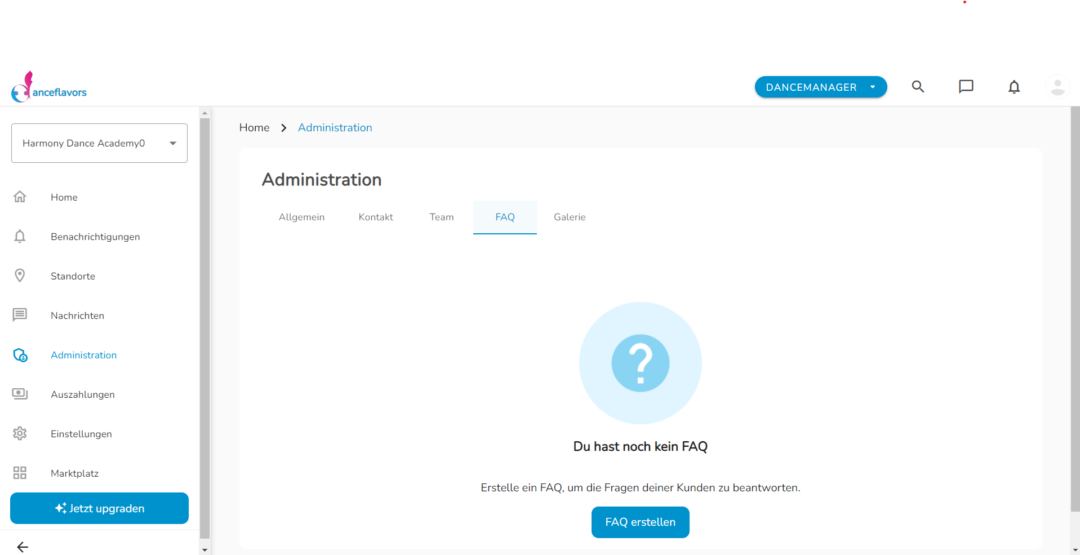
4. set up the FAQ area:
- Go to the "FAQ" section:

- Enter frequently asked questions to help interested parties and clarify open questions.
- Answer questions about courses, trial training sessions and other relevant topics.
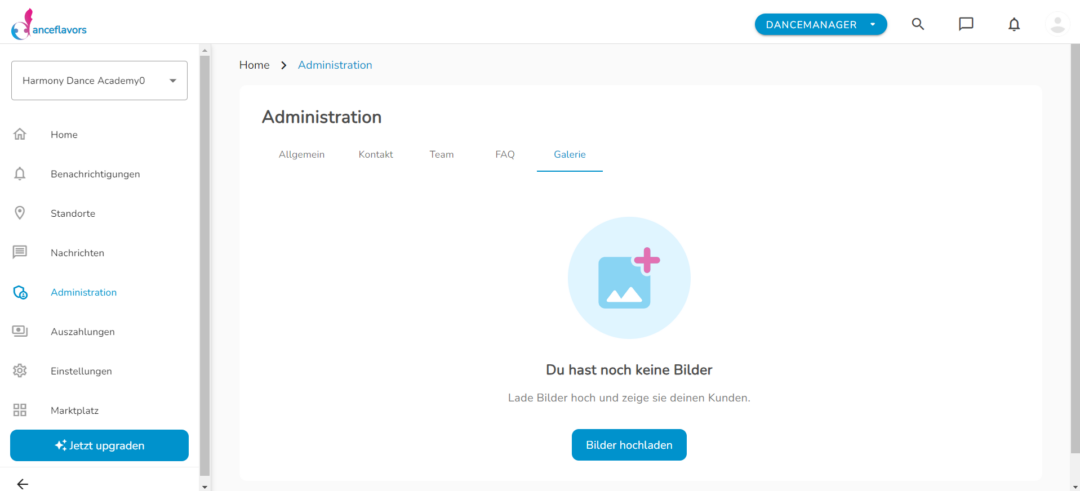
5. Update gallery:
- Go to the "Gallery" section:

- Upload more pictures to give more impressions of your dance school.
- Remove old pictures if necessary to keep your gallery up to date.
- Save all the changes and optimisations you have made.
Congratulations! You have successfully optimised the "Administration" section of your Dancemanager.
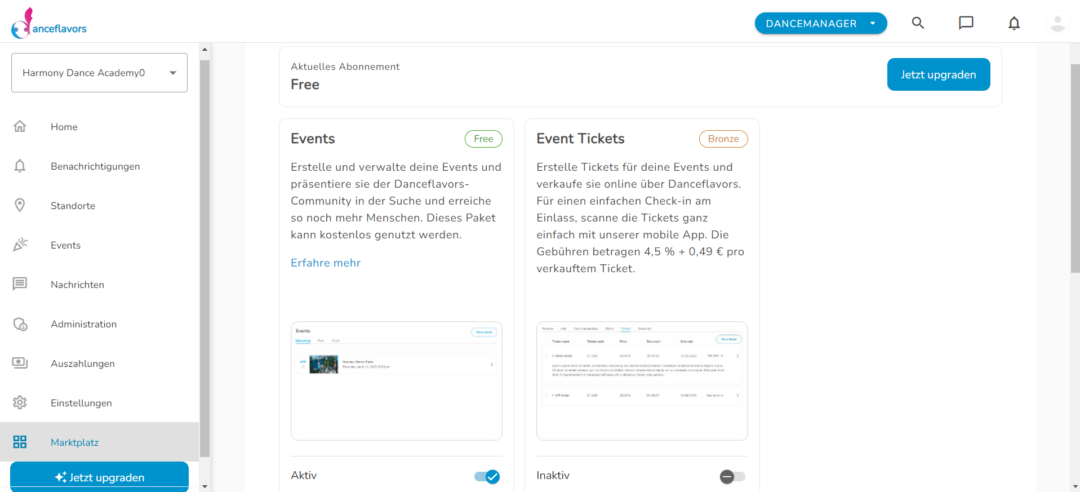
1. Activation of the ticket sales package:
- Click on the "Packages" tab in your Dancemanager.
- Activate the "Sell tickets" package, which requires a Bronze subscription.
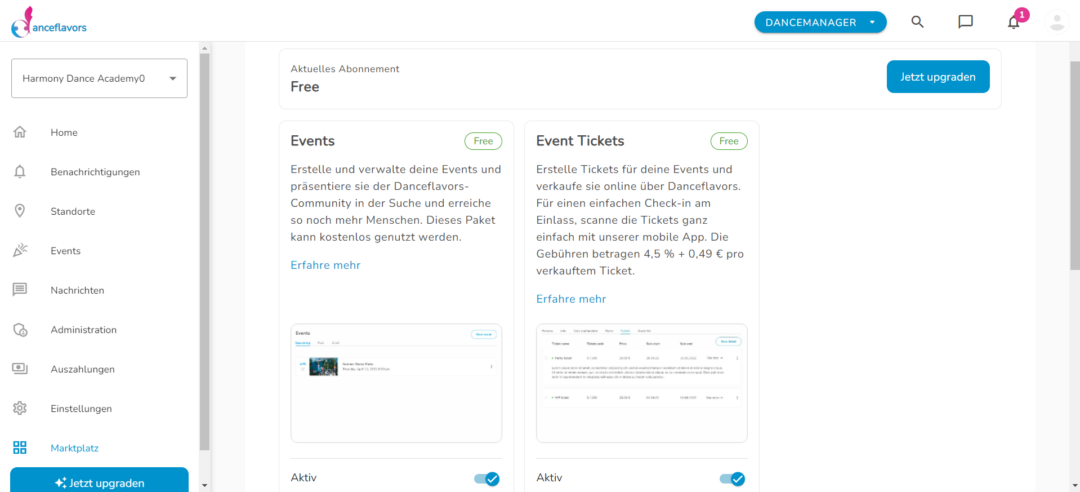
- Click on the toggle to activate the package and then select a monthly or annual subscription.
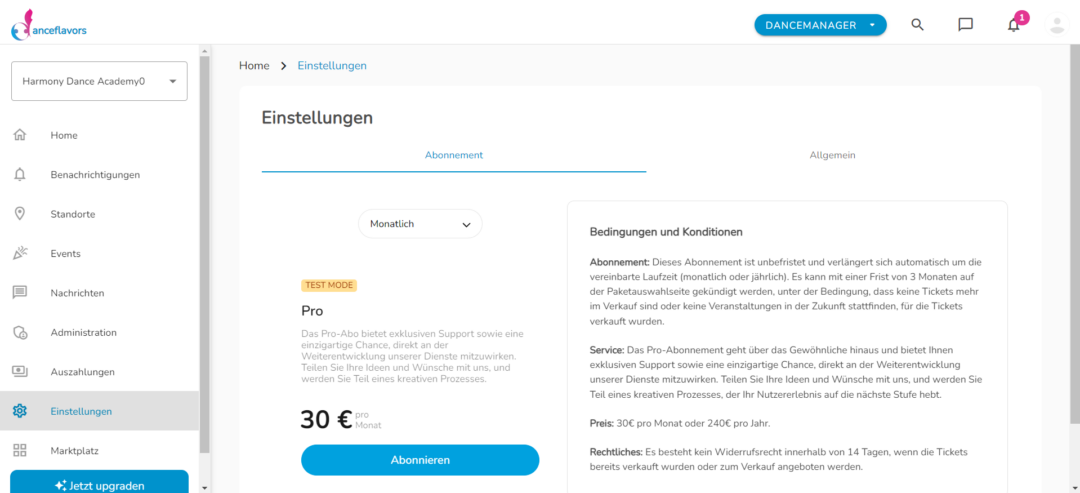
- Choose your payment method and take out your subscription via the provider Stripe.
- You can manage your subscription at any time in the settings.
2. Event management:
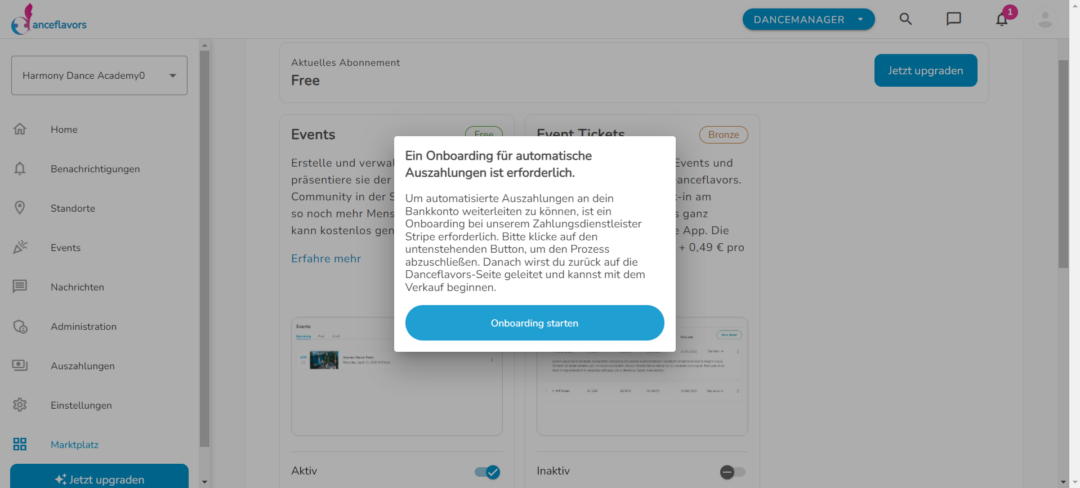
- Return to the packages and activate the "Events" package.
- Enter your details for the payout so that the money from the tickets sold can be paid out to you.
- Enter your personal details with Stripe, including your mobile phone number, email address, date of birth, address, phone number, industry and website.
- Add your bank details to receive the payouts.
- Once you have submitted your details to Stripe, return to Danceflavors and activate the package.
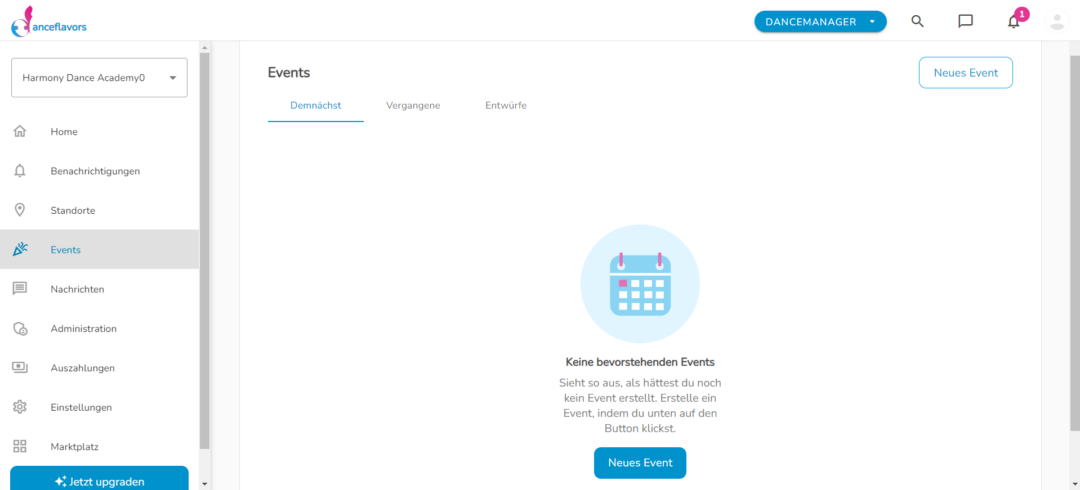
3. Ticket creation:
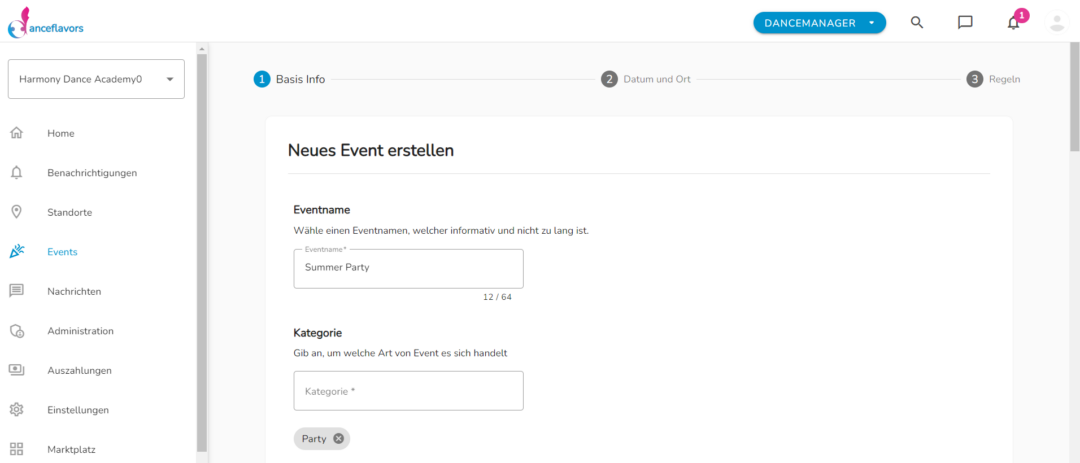
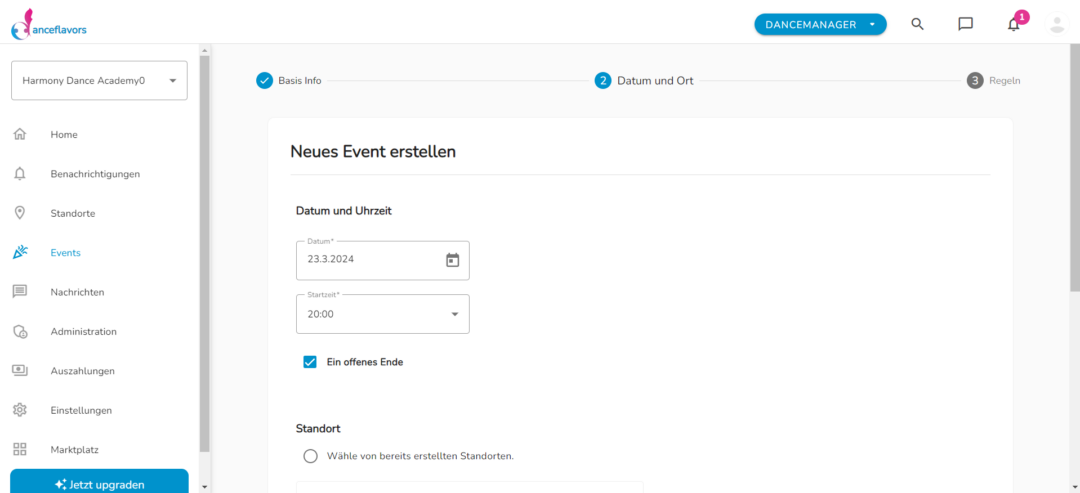
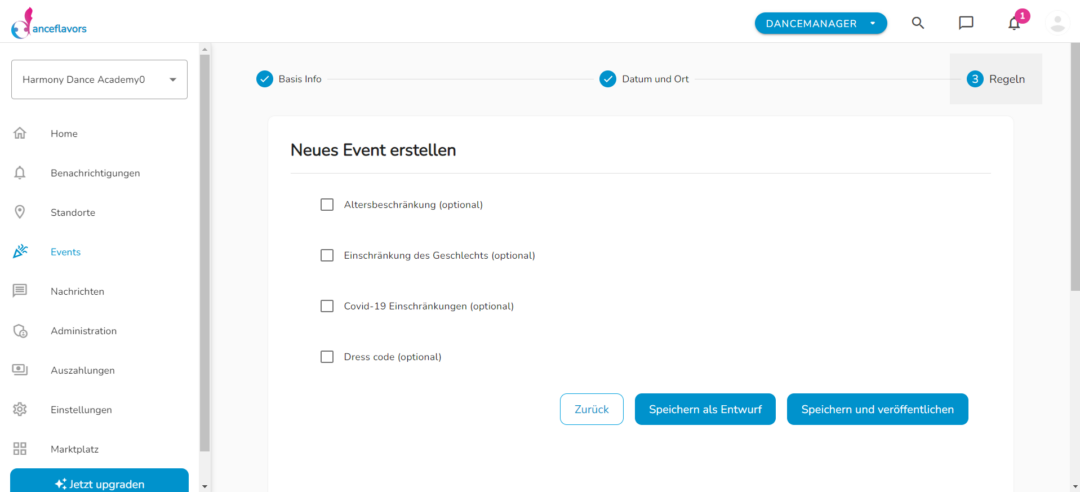
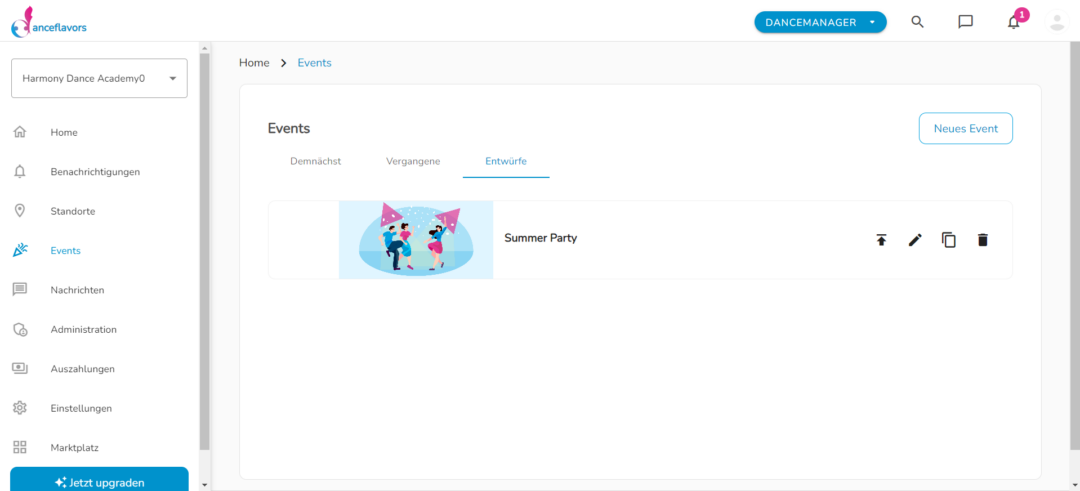
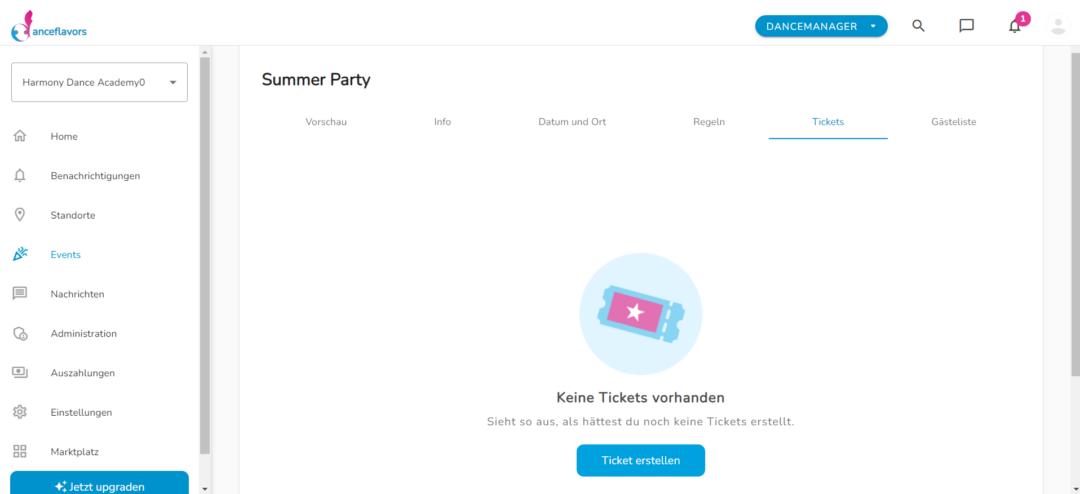
- Go to the "Events" tab and plan a new event if you have not yet created one.
- Click on your event and go to the "Tickets" tab to create a new ticket.
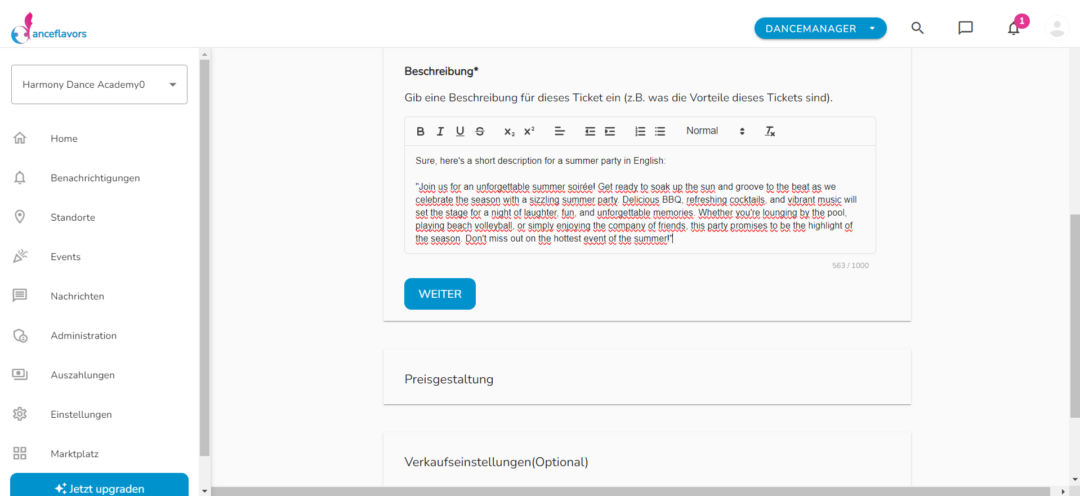
- Give the ticket a name, select the number of tickets available and add a description.
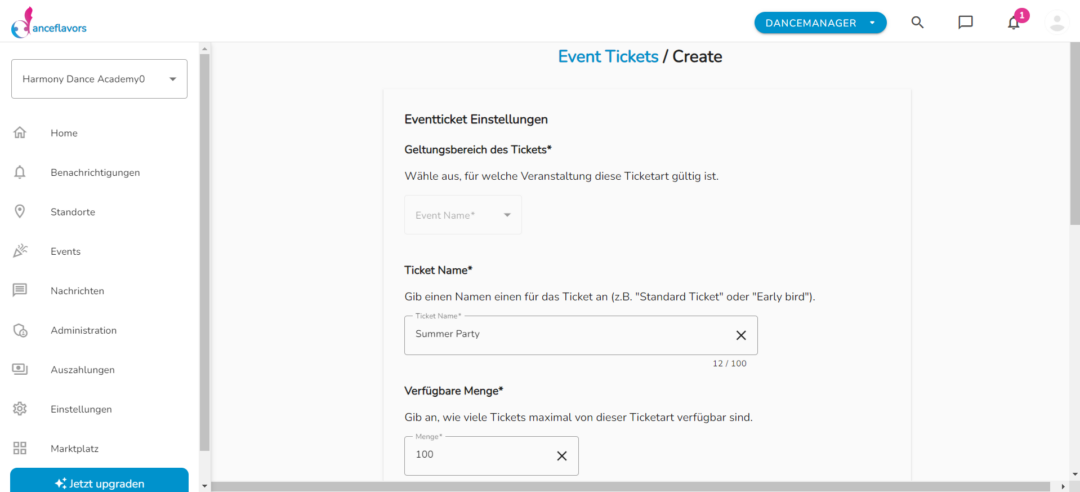
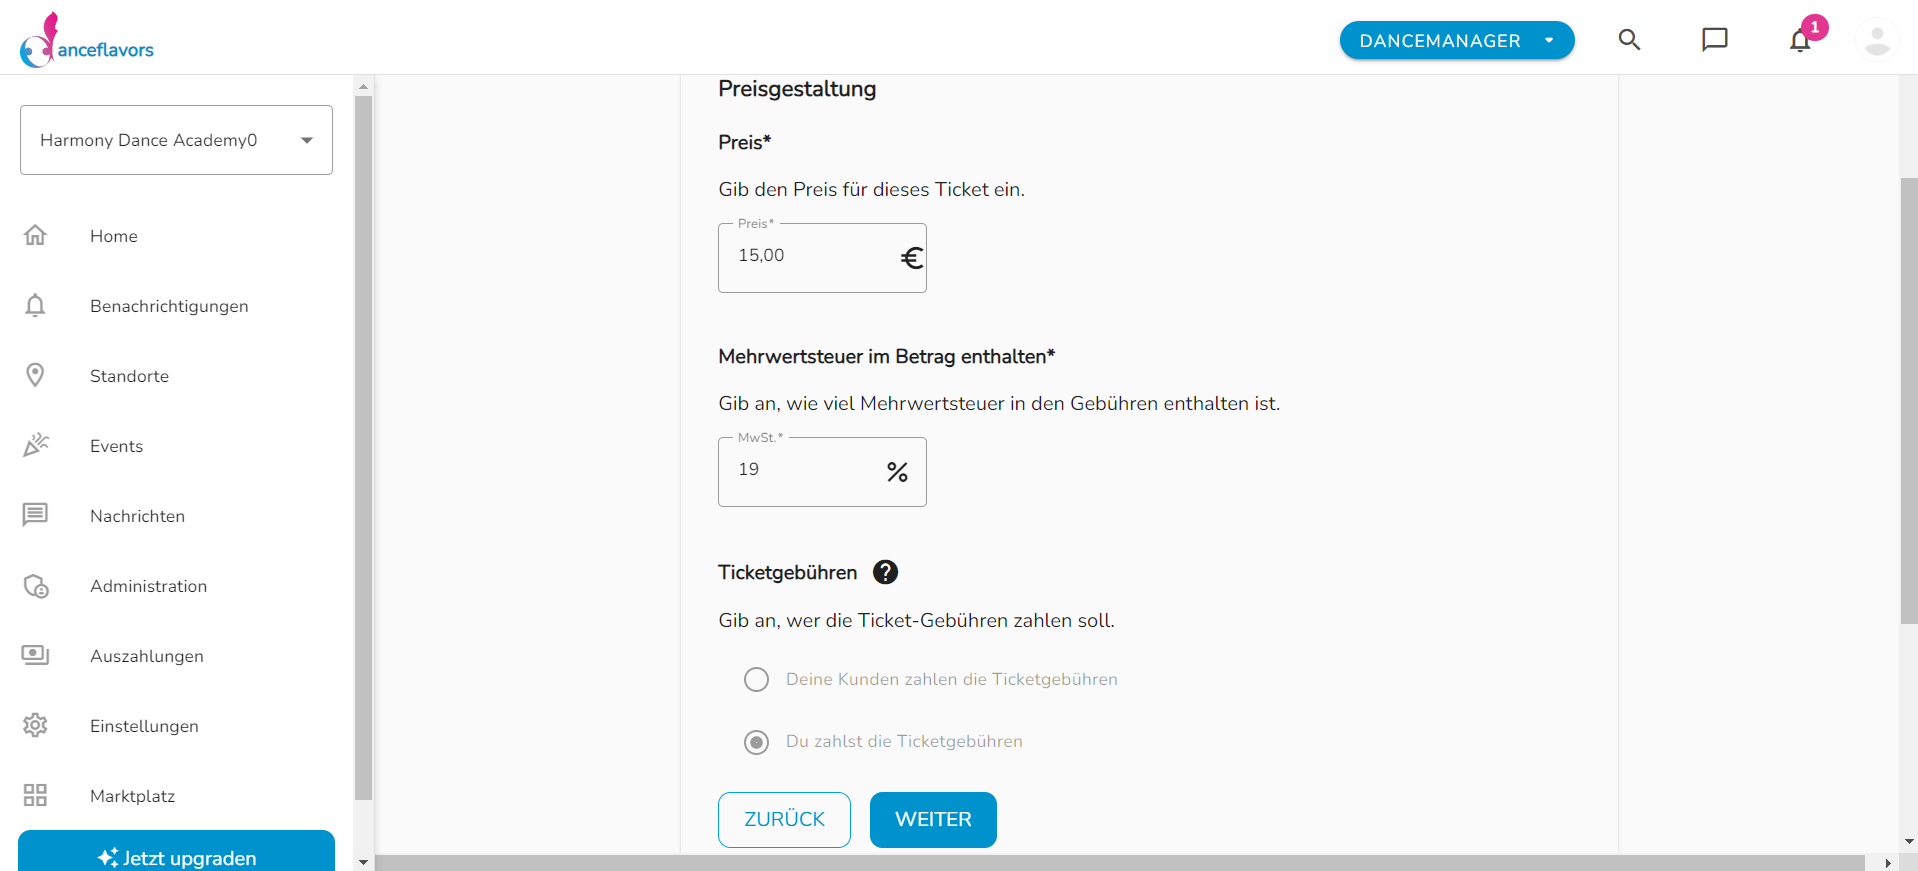
- Select the ticket price and fee.
- Determine the period in which the ticket is offered for sale.
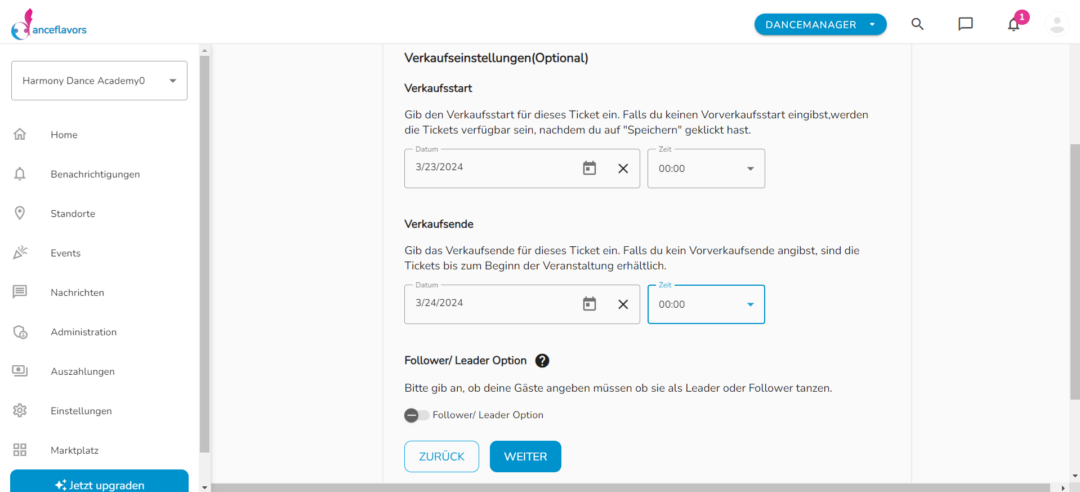
- Optional: Set whether the buyer should specify whether they are dancing as a follower or leader.
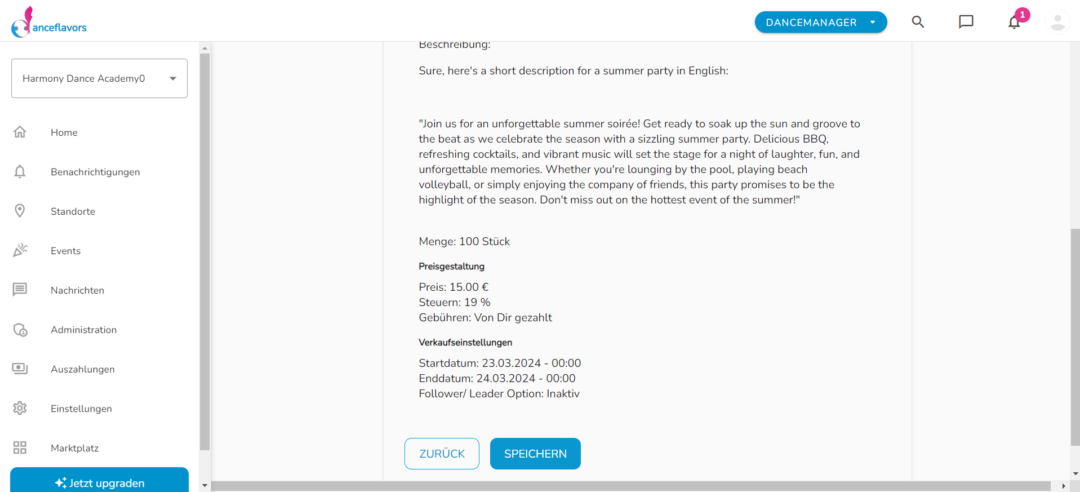
- Check all details and click on "Save" to put the ticket online.
4. Ticket management:
- Monitor the sales status of your tickets under the "Tickets" tab.
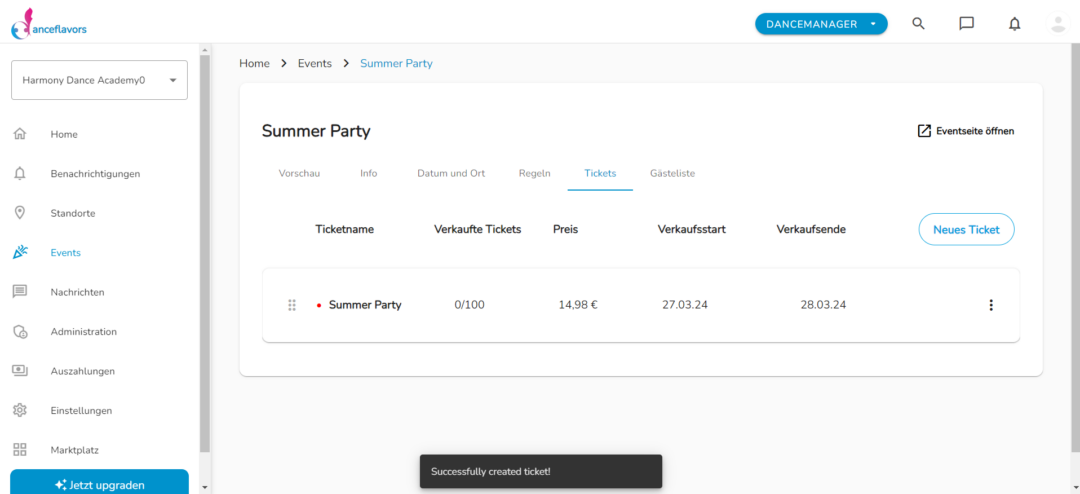
- Invite people directly to your event via the guest list.
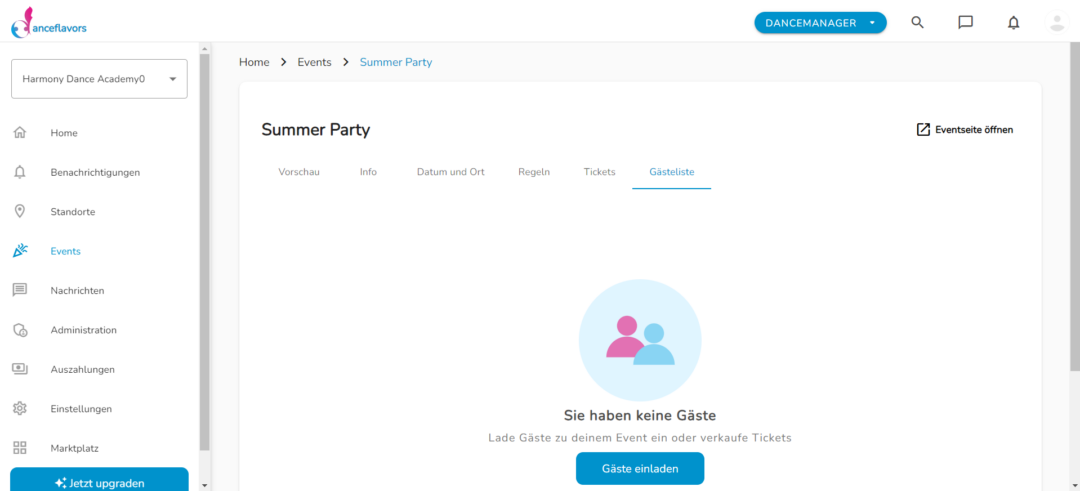
- Manage different tickets and the order in which they are listed.
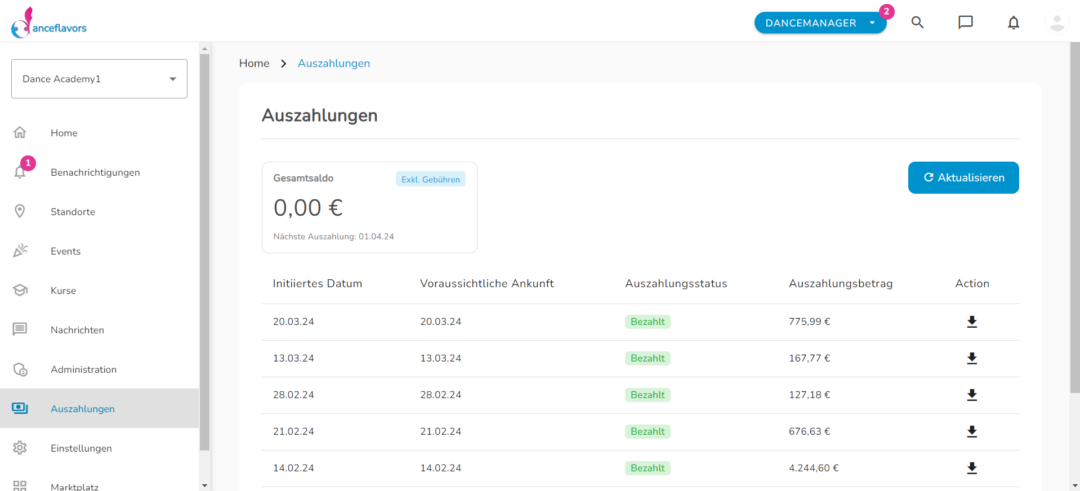
5. Monitor disbursements:
- Check payouts under the "Payouts" tab.

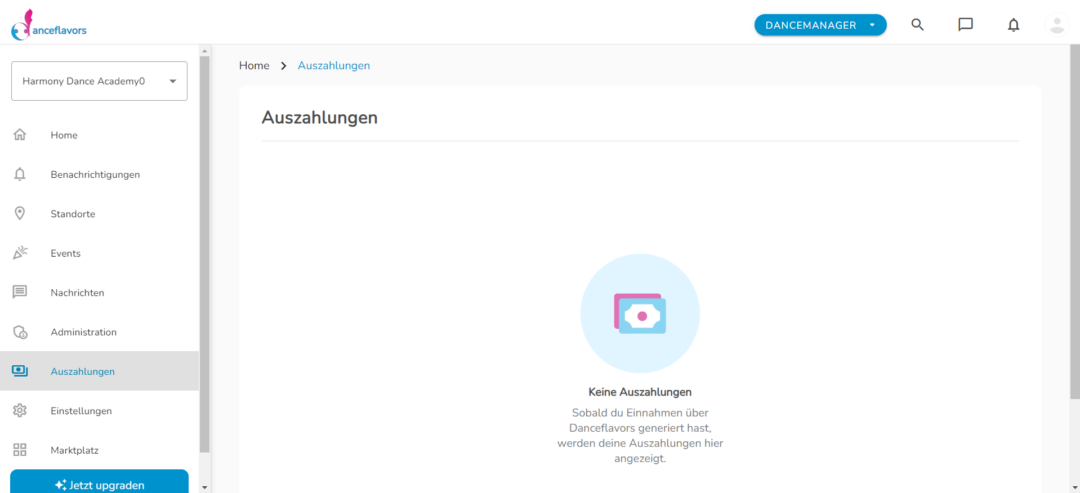
- Access the payout tab:
- Click on the "Payouts" tab in your Dancemanager.
- Total overview and next payout:
- You will see an overview that applies both to ticket sales and later to the "Courses" package.
- In the top left-hand corner, you will see the total amount of revenue, in this case €24.89. This is the net amount, as the fees have already been deducted.
- Below this is the date of the next payout, which is made monthly.
- Tabular representation of the payouts:
- The table shows all payouts and their status by the payment provider Stripe.
- Information such as payout date, expected arrival date of the money, payout status and amount are listed.
- Download the fee invoice:
- On the right-hand side of the table you can download the invoice for the fees you have paid.
- These fees are automatically deducted by Danceflavors so that only the net amount is transferred to you.
- Update and detailed breakdown:
- In the top right corner you will find a button to refresh the page to get the latest data.
- Clicking on a line will take you to a detailed breakdown of the payout.
- There you will see the gross amount including fees and the fees paid or the invoice amount.
- The table provides information on how the total amount is made up.
- You can download the invoice for this payout in the top right-hand corner. This is the same document that could be downloaded on the previous page.